
Design Experts
Samantha Pynn’s Design Lesson: Kitchen Reno Step-by-Step

Photo: HGTV CANADA
Design Experts
Samantha Pynn’s Design Lesson: Kitchen Reno Step-by-Step
Reduce reno stress and pull together a kitchen you’ll love with Samantha Pynn’s step-by-step plan.
The Palette
Now it’s time to pick the pretty (and practical) stuff. These choices should last awhile, so choose what you love. Start with the floors. Hardwood is durable and brings flow to adjoining rooms (if they’ve got hardwood, too!). Tile, on the other hand, can make a statement but can be hard to stand on for long stretches. Next, choose the cabinetry. Using more than one cabinet colour is big in the design world. If you want colour but don’t want to commit to an entire pink kitchen, opt for an island, as in the kitchen (below) designed for HGTV Canada’s Save My Reno. In smaller spaces, my go-to is dark lowers and creamy-dreamy uppers. For countertops, porcelain slabs that look like natural stone and wrap up the backsplash wall are all the rage. The look is luxe, especially when the slab extends to the ceiling. Plus, porcelain is durable and easy to clean. That said, tile is classic, more forgiving to install, often less expensive per square foot, and is a great way to add colour, pattern and personality to the room while also linking to decorative elements in your living and dining spaces.

Photography: Valerie Wilcox for HGTV CANADA
The Starting Line
A kitchen reno is an investment. You want to get it right the first time, so don’t swing a hammer until you’ve chosen everything and know where it all will go. Make a list of wants and needs. Ask yourself: How will you use your kitchen? Do you prefer lower drawers or doors? Not sure? Head to a kitchen showroom for a test drive. While there, note how far the appliances are spaced – what’s comfortable? What’s the best spot for dish and utensil storage for you? Keep in mind that open shelving helps to integrate open-concept spaces by providing a place for display. Finally, consider hiring a designer, who can ensure that you have proper appliance, cabinet drawer and door clearances; ideal sink placement; adequate lighting and electrical outlets; and enough of a counter overhang to sit comfortably if you have an island.

Herringbone FLOORS, Torlys, torlys.com. PENDANT LIGHTS, Lowes, lowes.ca. Photography: Valerie Wilcox for HGTV CANADA
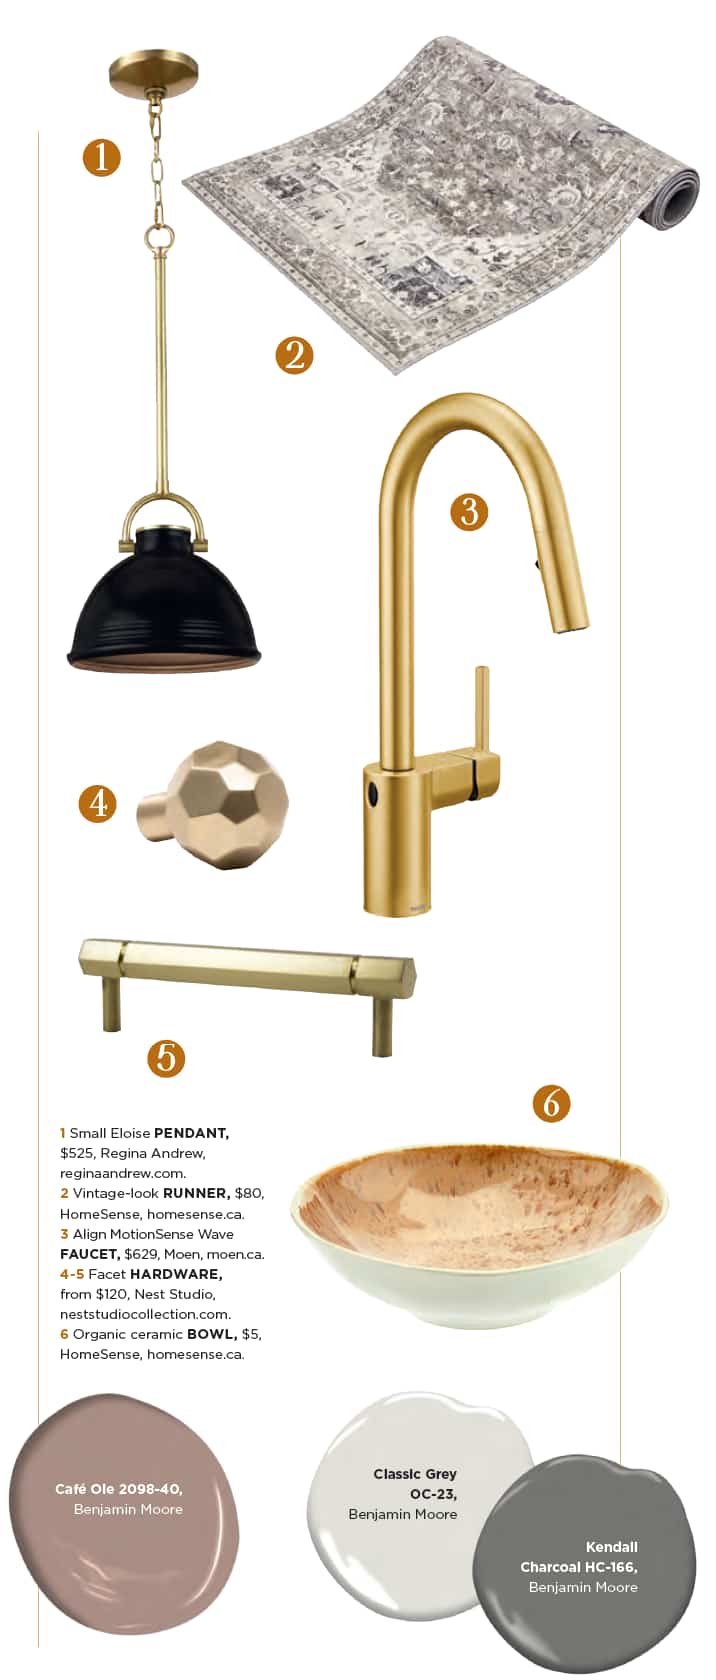
The Details
Once you’ve made it to the finishing design details – faucet, cabinet hardware, wall colour and light fixtures – you can take a breath. I’m not suggesting to shop for these at the last minute. In fact, it’s best to have the finishing details on-site to show your contractor before you start your reno. But, fortunately, they are changeable. When it comes to choosing the final elements, we’ve heard it a million times, but it bears repeating: don’t sweat mixing metals. Your faucet can be brushed nickel and your hardware antique brass. Mix light fixtures, too – perhaps a flush-mount over the sink and pendants over the island. Lastly, don’t forget to add softness to your kitchen’s hard surfaces with a fabric Roman shade and a floor runner (and remember to include an anti-slip underpad so you can scoot from sink to stove safely).

Porcelain COUNTERTOPS and BACKSPLASH, Ciot, ciot.com. HARDWARE, Richelieu Hardware, richelieu.com. Photography: Valerie Wilcox for HGTV CANADA
Biggest Kitchen Mistakes
- Forgoing a lighting plan. Ambient, task and accent lights are key to creating a great place to cook and hang out.
- Too few or too many electrical outlets. Include outlets for small appliances and the island; review with the contractor.
- Odd hardware placement. Well-placed and properly proportioned hardware will elevate your cabinetry.
- Going too fast. Avoid rushing decisions that you’ll regret.
- Too many cabinets. Leave room for art or open shelves.
Comments